
This week I’ve been writing a new earring tutorial (not one I can show you just yet, unfortunately) and came to the conclusion that none of the photography props that I usually use were working for this design.

I searched the house for anything else that looked like it might work and searched online for any DIY solutions that I could make. I found nothing of any use at all so decided to try and come up with something myself. This is what I ended up with:
You will need:
1mm wire
Thinner wire for wrapping
Something to use for a base
Round nose pliers
Flat nose pliers
Wire cutters
Cut a piece of the 1mm wire, approximately 2ft long and pull it through your fingers to straighten out any kinks.

Use the round nose pliers to make tiny loops at either end of the wire.
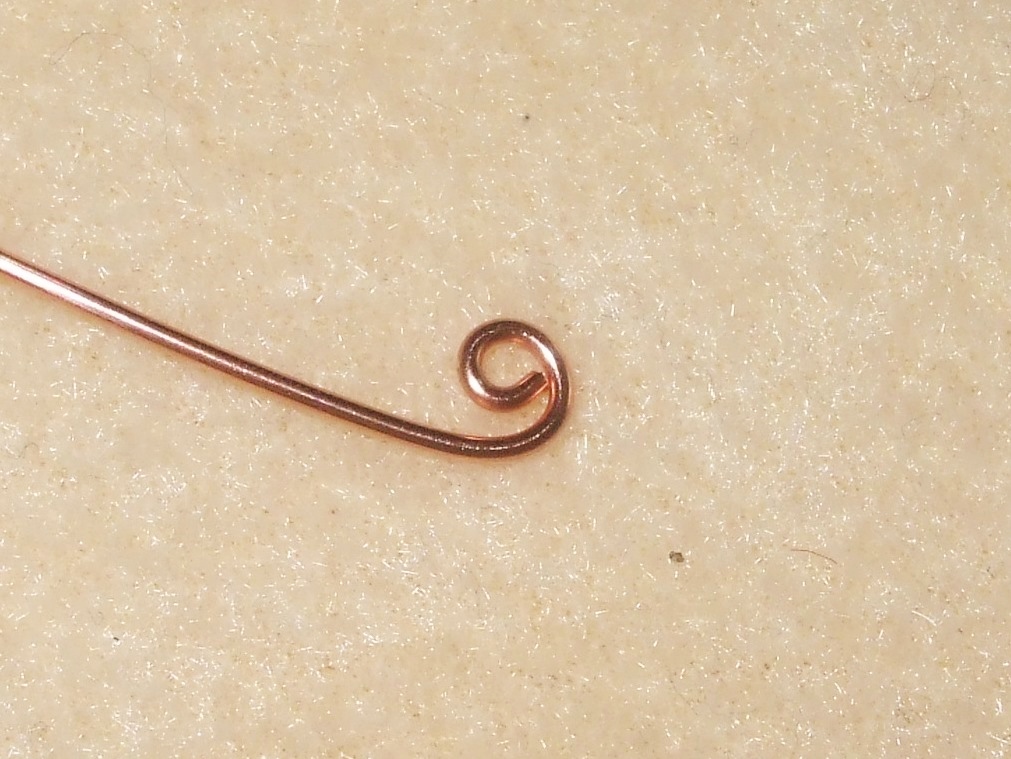
Continue to bend the wire into small spirals with your fingers. They don’t need to be identical, I think it looks nicer if they aren’t as they will be offset anyway.
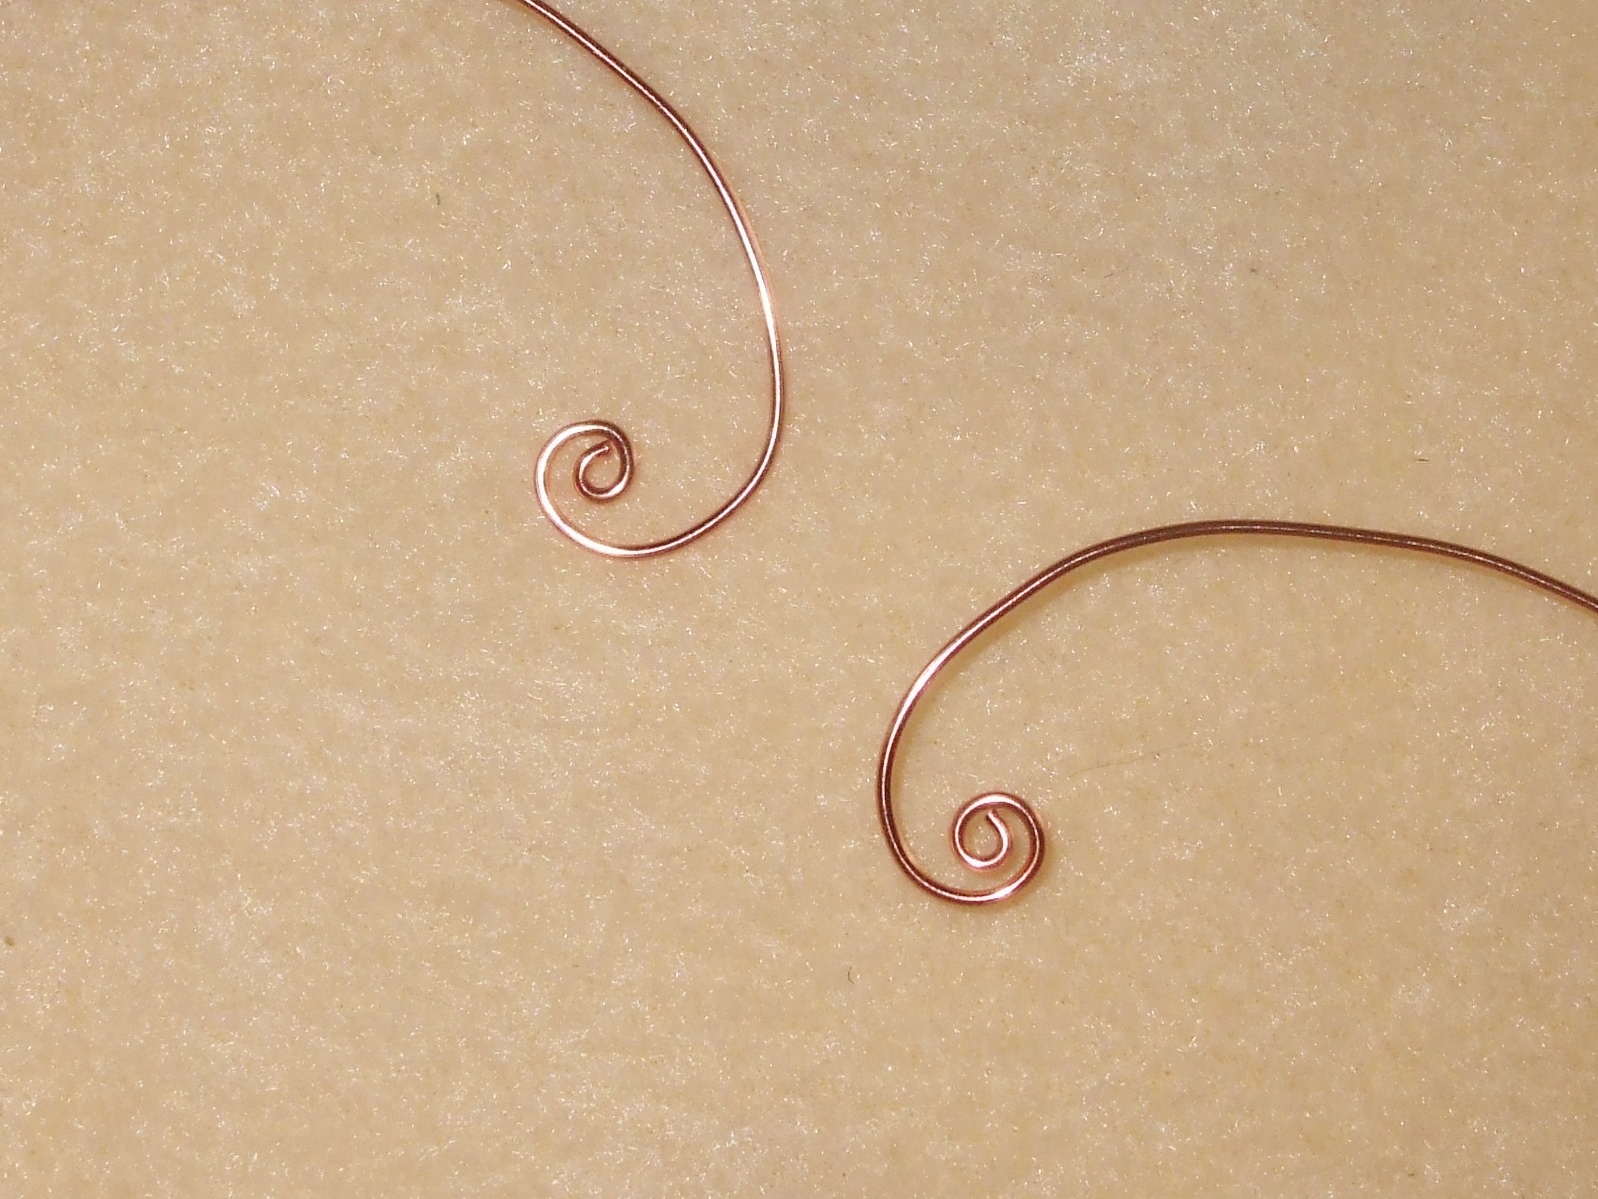
Continue shaping the wire into a wide curve on either side. You are aiming for a sort of heart shape. Pinch the wire into a short stem at the bottom so that you can push it into the base.

Cut a short length of the wrapping wire and wrap it neatly around the stem, using just enough wraps to keep it in place. Trim the ends of the wrapping wire at the back and press the wrap between the flat nose pliers to secure.

Cut another short length of wrapping wire and use it to join the two spirals at the top of the shape. Make one come down lower than the other as the different heights make photos taken on it more pleasing to the eye. Of course, you can always adjust the spirals later on if necessary.

You can create a base from clay, plasticine, a piece of wood with a hole drilled in it, or anything else you can think of. If you like to make heavy earrings you may want to use something sturdy to make sure the stand doesn’t tip over. I just used the base from my existing earring stand, wrapping tape around the wire stem to get a nice fit.

I made this stand, including taking the photos and writing the instructions, in about an hour. Not only is it quick to make but I think it looks pretty good and it definitely makes taking earring photos SO much simpler. Instead of having a lot of the stand in the background, all you get are the two wire spirals and a little bit of the top. I don’t know about you, but I think this looks pretty good and I’m going to make some more using different colours of wire so that I’ve always got one that matches.


Oh what a fabulous idea!! I LOVE it, Donna!! And so generous of you to share your process, too. I bet there are going to be a lot of these floating around now! 😀
LikeLiked by 1 person
Thanks, Nancy. I hope it is useful for people. I was surprised by the lack of information for anyone wanting to make something for this purpose. Of course, I could just have been looking in the wrong place.
LikeLike
Fab tutorial Donna. I think I might have to redo mine now 🙂 Yours is soooooo much prettier xxx
LikeLike
Thanks Gemma. 🙂
LikeLike